Friday, October 21, 2011
Ye Olde Smalle Update
We continue forth. Most of our concerted efforts are on the house, with a few forays into the kitchen and garden. We spend most of the days laying layers of baked bricks and mud mortar. The walls are high enough that we can start incorporating bottles as sort of a stained-glass situation. I'm learning about using plumb lines and levels and lining things ups. I could post some technical how-tos on this, but I haven't quite wrapped my brain around it enough to blog coherently. I also spend a good amount of time flinging mud at other people. Word like, "punk", "rude", and "idiot" have been thrown in my direction, but I know it's all in love. I have told everyone that they should worry about when stop flinging mud. If you go to the Mama Roja website, you can see results of this mud-flinging. http://mamaroja.blogspot.com This will be the last post for a while. We're mostly focused on just building the house, anyway. We'll be building on our day off, Tuesday, having an all-day fiesta/birthday party/Halloween party/pizza making party/costume party on Thursday and then heading off to some Jesuit ruins on Friday. Should be good times.
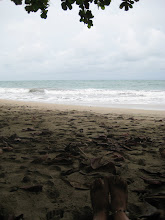
Below is the pyramid root cellar at the Chacra Suiza that we visited today.

Tuesday, October 18, 2011
Oops. Didn't realize it's been 2 weeks since I last posted. We've had a lot of rain lately (think 4.5 inches in one night), so lots of indoor activities. I did a "workshop" on how to make bagels. We've made peanut butter again, peach jam, chipas (Argentinian cheesy bread thing, but didn't quite turn out), and other tasty treats which I cannot remember at this time. Mostly our focus is on building the house. This mostly consists of sifting subsoil and hauling it in buckets up the hill to mix with the sand we hauled in wheelbarrows up the hill to mix with the water and pine needles that are already up there to make the mortar. AND hauling wheelbarrow loads of bricks from the base of the hill to the top of the hill. I am getting stronger. It helps when my hutmate and I sing medleys consisting of 80's jams, Disney songs, and showtunes while huffing and puffing up the hill, one pushing and one pulling the wheelbarrow.
I also found an intercambio partner. Basically, I blurted out at the waitress at the store/restaurant where we buy our bulk food that if she wanted to, we could have Spanish/English conversations. It was weird, but it worked.
We're visiting a farm on Friday run by Swiss immigrants where we will be eating meat raised right on the property. (Who ever thought I'd be excited to eat meat?!) Next week we don't have Tuesday off, but we do have an all-day fiesta where we will make pizza, probably empanadas, and then take 3 days off after that. I'm planning on heading to some Jesuit ruins nearby.
Love to you all.
Tuesday, October 4, 2011
Wine & Aperitif
Mulberry Wine:
-1 Kilo organic sweet fruit, 4-5 liters water, 1 kilo sugar
Bring ingredients to a boil, let it cook together about 10 minutes. It’s okay if you have stems and seeds in your mix. Remove from heat and allow to cool to body temperature. Add about 1.5 tsp yeast. Put in a non-airtight, covered container and store in a cool, dark place. Stir every few days if desired. In 3 weeks-one month the wine will be ready. At this point, you can strain off the wine and drink it while it has a sweeter flavor or you can let it sit longer therefore losing some sweetness and gaining a stronger wine flavor.
Hesteridina (Aperitif):
-10 whole cloves, the rind of 3 oranges, 250 g of sugar, 3 sprigs of fresh rosemary (10 cm length), ½ liter grain alcohol (or cane alcohol, 96 proof), 2 liters water.
Chop rind into small pieces and dry in the oven. Mix all ingredients in a large bottle or carboy. Shake every 2 days and store in a cool, dark place. Ready in 15 days.


Iguazú Falls
Well, we had our first end-of-month break. We all went to Iguazú Falls. Google it. Here are some memorable points:
-Sprinting for and missing the 7:45 bus. Walking 45+ min to the next town and doing the SAME thing. Misplacing my beloved slouch hat and handkerchief in the process. Meeting really awesome street vendors and spending time talking with them and hearing about all the stuff they make and places they’ve traveled. A cheap, good hostel. Going to the falls, realizing my stomachache wasn’t going away, and in fact it was getting worse. Looking at the most amazing waterfalls ever for about 6 seconds and then trying to run to the nearest puking spot. Getting stuck behind two old ladies blocking the path who did not seem to grasp that I WAS GOING TO BARF ON THEM. No amount of “excuse me”’s helped. I finally got past them and spent the whole rest of the day on a bench and then creeping down the path with frequent rests on the side of the road.
The next day we went back, took the boat tour into the falls and the river float. Amazing. Enough said. Drawing trade night. You basically start drawing and then pass it around the circle trading once you get sick of your drawing. Someone waking up having no idea where their wallet was or why they weren’t wearing pants. Not one, but TWO people finding out that they had burrowing insects in their feet that needed removal. Street surgery. Of course there was more to the trip, but these are some good highlights.


Technical Blog: Natural Building III
Recap: We have filled the retaining walls. We compacted them with walking. We compacted part of the porch completely with the stomping tool. The A-frame is up.
Now, we want to section off the porch and kitchen areas so we can build small retaining walls that will provide the support for the walls that will divide inside from outside and kitchen from bathroom. I think the original retaining wall provides support for all the other walls we’ll construct.
We measured 125 centimeter from the edge of the original retaining wall to mark where we’ll put the dividing wall for the porch/living area. We drove in a stake at one end of the room. Then we did the same thing at the other end of the room. After that, we used a plumb line hung from the A-frame to make sure the stakes were straight.
So, we now have a stake at each end of the line that will eventually be the wall dividing the porch from the living room. We tied a piece of string between the stakes to give us a guide to build a straight wall. We dug a trench deep and wide enough to accommodate a line of bricks – one brick wide, two bricks high.
Next, using the string as a guide, we put down a layer of cement (see recipe below), then a row of bricks, then a layer of cement, then a row of bricks. Note – don’t stack the bricks in columns. You gain more stability by shifting the row down a half a brick. (If this doesn’t make sense in writing, just look closely at the bricks in the pictures.)
When you’re laying the bricks, you can be really professional about it. You can get out a level and make sure every brick is perfectly aligned. We didn’t do this. The steps we took were enough for K&M to feel satisfied that the structure was stable. Aesthetics aren’t so important with the bricks given that they will soon be covered with a thick layer of mud.
Recipe: Cement: 4 parts sand + 1 part cement mix + around 1 part water (give or take)
If you don’t have a fancy machine, combine all the dry ingredients in a mixing unit using a hoe. See ours below. Once mixed, make a well in the middle and add a little water. Once combined, repeat until the water and mixture are thoroughly combined. Have someone who knows about cement give you pointers on a good consistency. Wetter is better, but you do hit a point where it’s too watery.
Tips: pour the dry cement from a close distance. Dumping it from high up causes it to waft everywhere. Yuck. Letting the first bit of water sit for a while in the well makes later mixing easier.


Technical Blog: Natural Building II.
Okay, so I’m feeling a little overwhelmed by the thought of blogging about the whole earthen building process. There’s a lot going on and I know I’m forgetting some of the important technical details. But the best way to retain knowledge is to teach it. So, I apologize if I’ve missed any steps, but at the bottom of the post I’ve listed some other resources for further learning (a drop in the ocean of options).
Recap: We’re working on 2 projects, a drop-toilet repair and building a house from scratch. The house is what I’ll be covering here and, when our internship is done will include a small kitchen, bathroom, living/sleeping space, and porch on two sides of the house. They plan to expand later.
What we’ve done so far. The house is on a slope, so it was constructed in 3 levels (not stories, but heights, like steps.) Each layer had a retaining wall built of multiple layers of baked bricks with cement between. There were also sturdy pillars in each corner and in the center, back wall of the house cemented into the ground. This phase was completed by the neighbor and his crew. Yes, we could have done it ourselves, but K & M wanted to lay a really good foundation. I believe it was the same crew that also put up the A-frame, with help from a few of the interns.
Then came the super awesome work of hauling dirt uphill by wheelbarrow load and bucket. Learning lesson: take breaks! Use water, mandarin oranges, and mate tea liberally. Plan a pizza night for the same week to boost group morale. We filled in the retaining wall and stomped it down by walking on it. We also compacted the dirt further using the tool shown below. It might have a name, but you basically just lift it up and let the weight of it slam down. Once the dirt has sunk down, you add more dirt and continue the process until the slamming tool produces no major results. [Why? This means when you put your cement floor on later, you run less risk of it caving in or cracking badly.]
Barefoot Architect – Johan Van Lengen, Home Work Handbuilt Shelter – Lloyd Kahn, Building Green – Clarke Snell and Tim Callahan, The Good House Book – Clarke Snell


Subscribe to:
Posts (Atom)